
Planning your dream wedding invitation? In this blog, we’ll walk you through creating a stunning design using Photoshop. Before we dive in, ensure you’ve downloaded the resources linked in the description for a seamless experience.
Greetings, everyone! Welcome to our creative corner where we specialize in bringing your visions to life. Today, we’re diving into the art of crafting a beautiful and elegant wedding invitation using Photoshop. Follow along as we guide you through each step, and feel free to download the resources mentioned in the description to follow the process seamlessly.
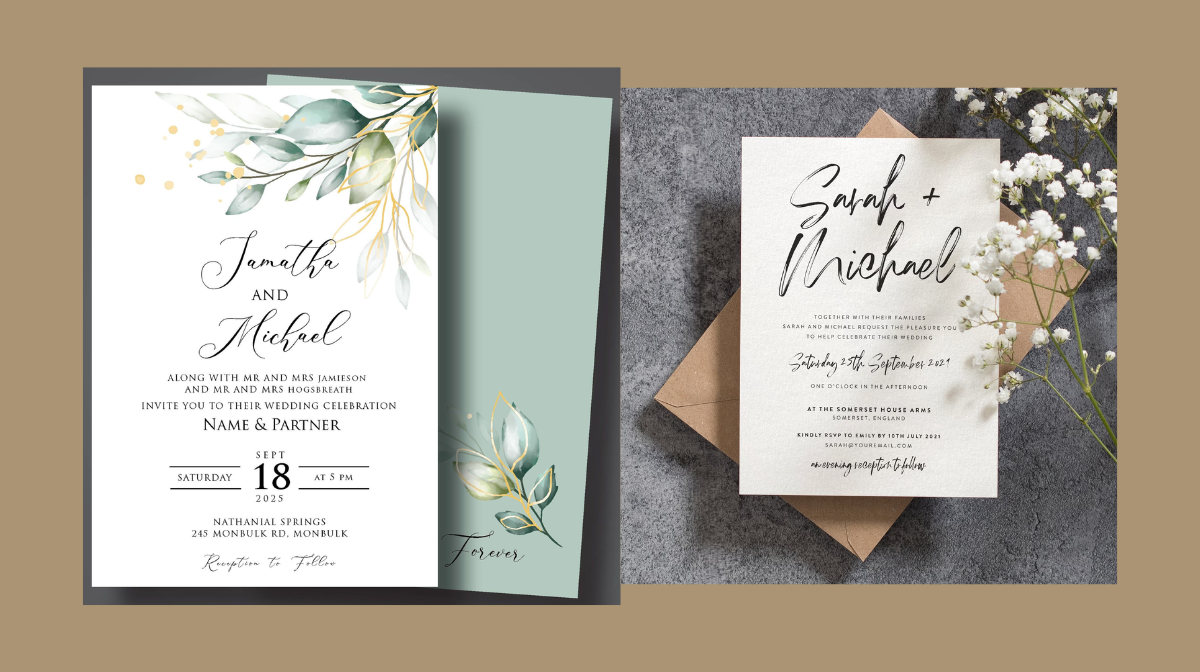
Steps to make wedding Invitations using Photoshop:
Setting Up the Canvas in Photoshop :
To begin, open Photoshop and create a new document. The size depends on your preference; for this tutorial, we’ll use 5×7 inches. Go to File > New, choose ‘Print,’ and select ‘B5.’ Click ‘Create’ to start your canvas.

Background Magic:
First things first, let’s set the mood with a captivating background. Head to File > Place Embedded and select a background of your choice. Adjust its size and opacity to blend harmoniously with your canvas.
Layering with Finesse:
Bring in additional elements to enhance your design. In this tutorial, we’ve chosen a tropical background to add a touch of flair. Adjust its position, size, and opacity to achieve the perfect balance.
Adding Text:
Time to make your invitation personal. Copy and paste your text, selecting fonts like Railway, Script Allura, and Comfortaa for a varied yet cohesive look. Adjust alignment, spacing, and size to perfection.
Special Touches:
For names and key details, consider using different fonts and styling options. Play with gradients, opacities, and effects to add depth and visual interest. Don’t forget to personalize the date, venue, and any additional information.
Bible Verse Elegance:
To add a touch of grace, include a meaningful Bible verse. Use a readable font like Poppins, and don’t hesitate to experiment with sizes and placement. Keep it simple and elegant.

And there you have it! A beautiful, personalized wedding invitation ready to impress. Feel free to explore different backgrounds and fonts, making the design uniquely yours. Once you’re satisfied, share your creation with us on Instagram—we’d love to see your masterpieces. If you found this tutorial helpful, consider subscribing for more creative content. Happy designing!
Frequently Asked Questions (FAQs)
How do I start creating a wedding invitation in Photoshop?
Begin by opening Photoshop, create a new document, and choose a size. Import a captivating background and set the tone for your design.
Can I personalize the fonts for the invitation text?
Absolutely! Experiment with fonts like Railway, Script Allura, and Comfortaa. Copy and paste text, adjusting alignment, size, and spacing to your liking.
How can I add special touches to make my invitation unique?
Enhance details like names and dates using gradients and effects. Consider layering different fonts for a varied yet cohesive look.
Any tips for adding a meaningful Bible verse?
Select a readable font, such as Poppins, and experiment with sizes and placement. Keep it elegant and simple for a touch of grace.
Related Articles: